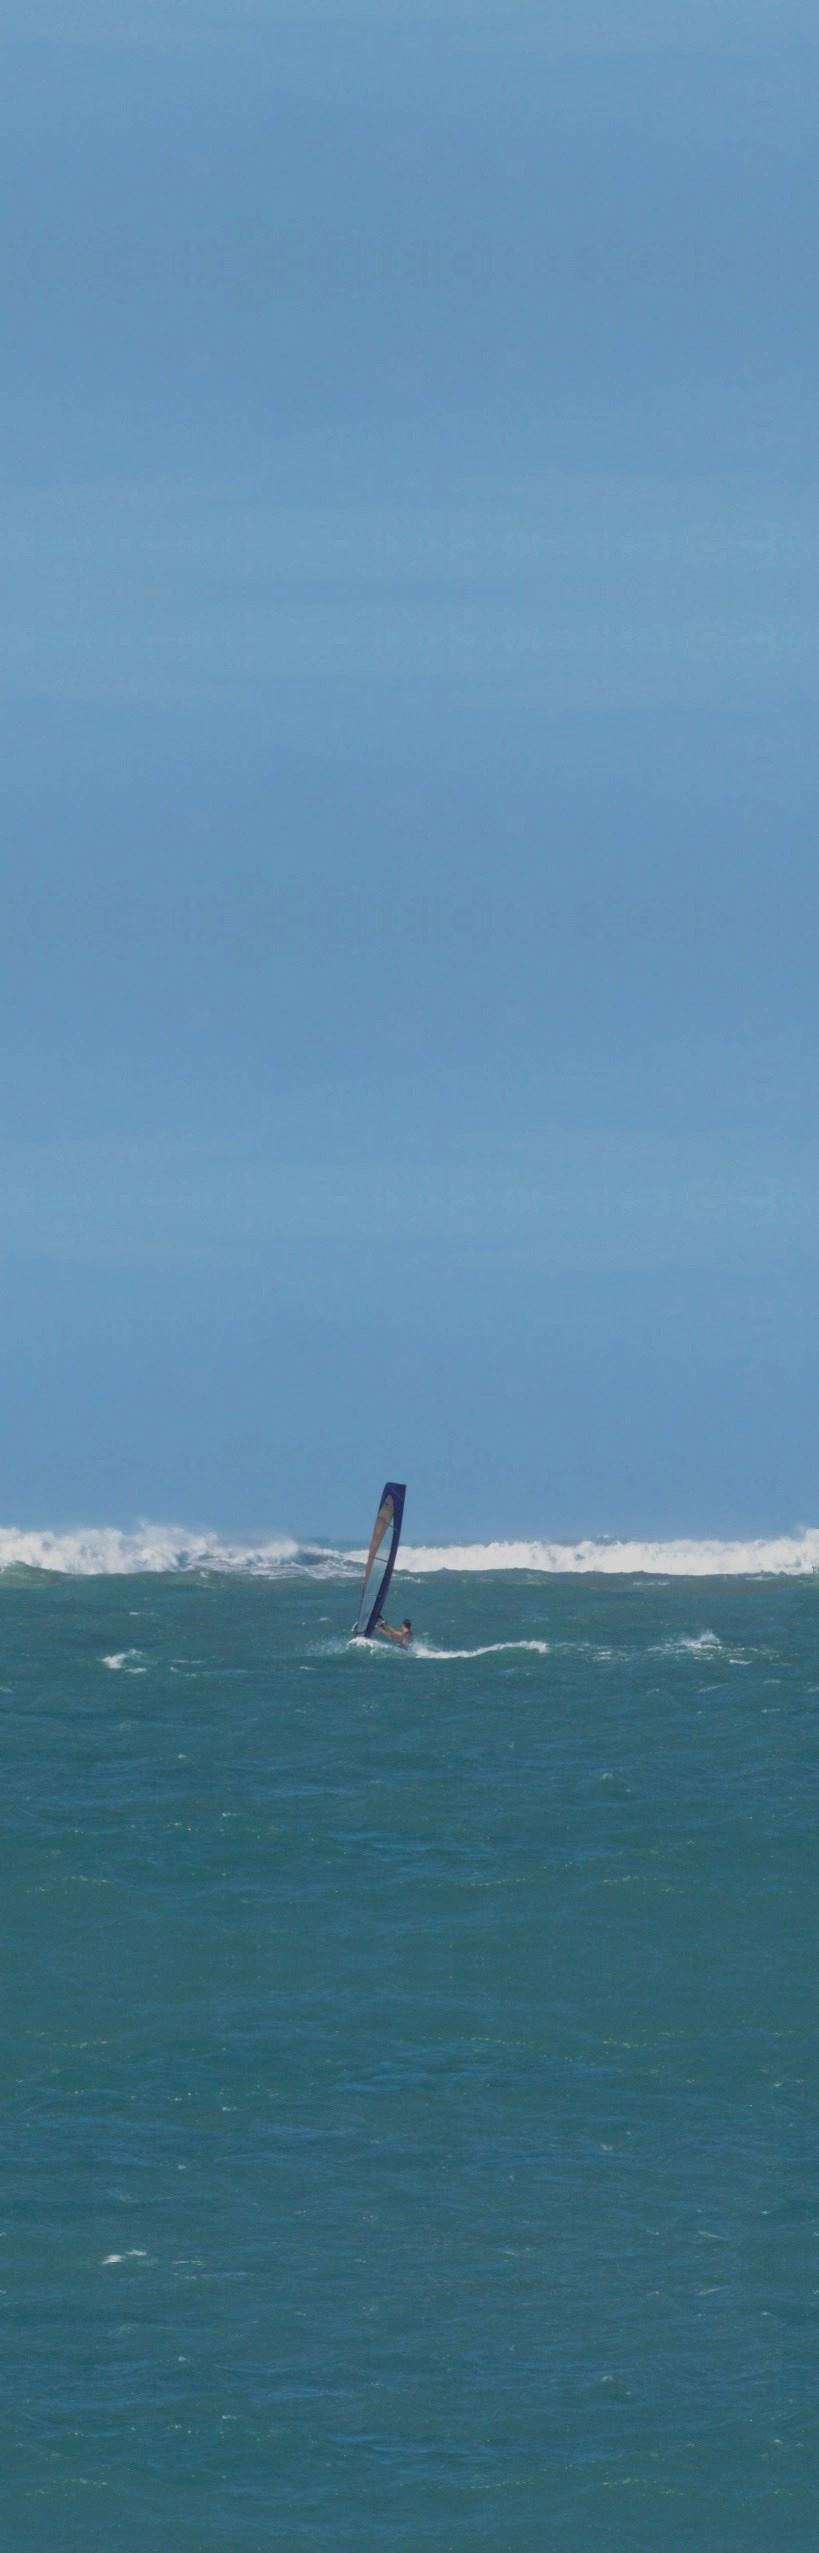


Windsurfing can be challenging to figure out, on this page I try to focus on answers that can be difficult to find online. New to this section, the Big Windsurfing FAQ, the Tip of the Day, and a Sail Quiver Calculator :) ! You will also find how-to's, tutorials, and information about windsurfing gear along with products I recommend from repair to action cameras!
|
|
 |

Tip of the Day!

To take off faster in light winds, once in the front footstrap, place your back foot slightly off center
towards the downwind rail of the board and use it as an accelerator pedal :)
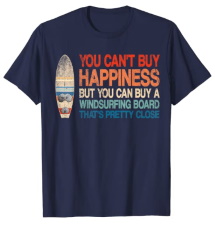
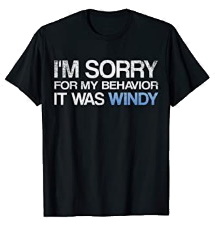
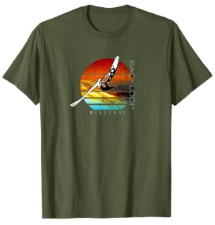
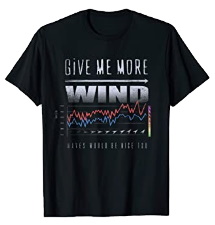
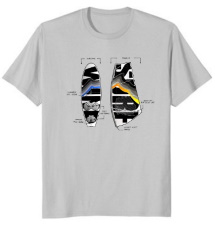
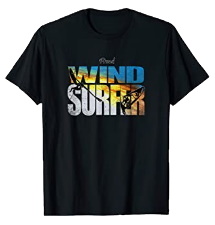
Looking for gift ideas for windsurfers? I decided to start making my own windsurfing designs!
Check out my all new STORE page for more awesome products such as retro t-shirts,
hoodies, mugs, hats, and even home decor!
Each of the following models is available for women, men or kids in a variety of colors.
Please, do forward me your ideas or requests, I may totally create something for you.
Come back often for updates :)
View all designs in my store...
View all designs in my store...
Quick TIPS for better FAST TACKS :) ! Improve your success rate with these precious tips.
Here are some of the products I use and recommend:

The BIG Windsurfing FAQ top ⇧
Welcome to the Big Windsurfing FAQ!!! Here I'm trying to focus truly on the main questions that
we may have about windsurfing. If you don't get your answer here, I may be able to help.
Contact me with any questions!
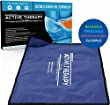
Hot & Cold Gel Pack
Ice or gel packs, anything super cold wrapped in a cloth.
Ice helps reduce swelling, it works really well.
Moderate stretching helps promote blood flow through the area.
What I found true was that muscle tension was causing the tendinitis.
So massaging muscles leading to the tendon to release the tension.
For tennis elbow, we can use our fingers to dig into the outer forearm
muscles and move our hand around so that the fingers massage the muscles
on their own.
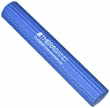
Therapy Flex Bars
For golfer's elbow, I have found massaging the biceps to be effective.
Ice packs over the inflamed tendons/joints/muscles and stretching.
The therapy flex bar also help tremendously by inducing a unique stretch otherwise
difficult to achieve.

Turmeric Curcumin
Supplement
Then, when out sailing, you'll need to focus on what could cause the problem.
Does it come from your setup, your technique?
Watch out for that slippery boom grip, sliding gloves,
favor the waterstart to uphauling, etc.
Go with the sail, let is bring
you forward into the jibe. Avoid clenching and resisting, think smooth.
When you are tired, stop! Try to sleep (and sail!) with your arms straight :)
It's also good to introduce natural anti-inflammatory turmeric (curcumin) and ginger
into your diet.
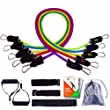
Resistance Band Kit
Some level of discomfort is completely normal, expected and a good thing!
Now, regarding your back, watch out when lifting, carrying your gear, or uphauling,
bend your legs. Be sure to use the harness and focus on driving the power
onto the board with relaxed arms and solid legs.
Pain around the front area of the shoulders can be linked with a boom being too high
or harness lines being too long. Both can add unnecessary work to the arms. Lines a bit
too long may also be the source of back pain.
To release tension in rotator cuffs and help realign shoulders, I have found the elastic
resistance bands
to work really well. The best exercise for me is to pull up and out with my arm starting behind my back,
the band being attached on the opposite side of my arm at mid height.
Finally, I tried falling asleep with my arm bent, elbow out, and
palm under my head near my ear.
It seemed to release tension in the rotator cuff.
Maybe ditch the pillow, I know... kinda hard!
A couple of final tips to release tension on the shoulers is to keep elbows at our sides when weighing
down on the boom. This let us put more weight down and reduces side leverage against the shoulders.
When washed and pulled by a wave, keep elbows bent really close to your body.
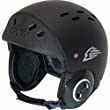
Gath Helmet
When falling, do always try to keep at least one hand on the boom, preferably the front one.
Or throw the rig away from you and remain under water until the rig has a chance to come down.
It's obvious that a helmet protects us when hitting the mast.
However, when hitting the water, the extra surface area of the helmet could create a more violent effect on the neck and even the head itself.
So make sure to use a thinner model which penetrates the water more gently such as the Gath surf helmet.

Foam Ear Plugs
Personally, I use simple foam ear plugs that I cut in half to reduce the length and the probability of losing them in the water.
They are not completely waterproof but I never have to empty the water out of my ears.
It reduces the noise and softens softens the chop curiously!
They prevent eardrum issues when slapping on the side.
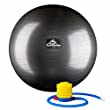
Fitness Yoga Ball
For immediat relief, the best exercice I found was to lay down over an exercice ball and arch my back backwards.
A midler stretch consists in laying down on the floor, lift legs bending them at 90 degrees and rotate hips to the side.
I found more important to stretch backwards as the pain seems to be coming from our back being bent forward.
Then, I use a foam roller, laying down on it arching my back, pressing down onto the roller.
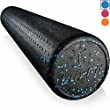
Foam Roller
Then, we need to find what is causing the pain. check your harness, is it old? Maybe it's become soft.
Some harness stay rigid longer. The ION Radium offers great back support that seems to last.
Try to feel what happens when sailing.
General
∨
What is windsurfing?
In essence, windsurfing is a sport where we
ride a board, set with fin(s) & straps, hooked up to a sail which helps us
use the force of the wind to move over water.
The board helps us float, (aqua)plane, jump and slide.
The sail is attached to the board in one spot and can move in any direction.
We hang onto a boom (bar attached to the sail) as it pulls or pushes us around.
(Aqua)Planing speeds start at around 10-12 knots, from there we can go to around 20 knots.
Racers often reach 30, while the world record is over 60 knots!
We can sail in 5 to 60 knots of wind :)
∨
Is windsurfing hard? Am I fit enough?
Windsurfing can be hard as portrayed in my video.
It's the use of appropriate gear matching our level that will help us improve with the most success.
Anyone can windsurf, there are no limits, it's probably good to know how to swim.
Things happen, and we may need to swim back to shore!
The reward from practicing the sport is pretty intense, truly an amazing activity.
Through time spent on the water, we become more humble, respectful of others, and learn
about ourselves, it's a journey!
∨
What is Cabarete?
Cabarete is the name of a small town on the North coast of the Dominican Republic,
located on the island of Hispaniola which it shares with Haïti.
The Dominican Republic is famous for its coffee Santo Domingo, which is also the name of the capital,
the Mamajuana drink made of leaves, barks, sticks and roots.
The bachata and merengue dances originated in the DR.
Spanish is the main language. The closest airport to Cabarete is Puerto Plata (POP), then
Santiago de los Caballeros (STI, Cibao International Airport), Santo Domingo
(Las Americas, SDQ) and Punta Cana (PUJ).
The main spot of Cabarete is a bay with sand throughout and a reef about 800 meters
out where the waves break. They break more onshore upwind of the spot and
tend to curve more side downwind. Now, the reef being out there it's prone
to current and other swells, so the wave riding can be challenging particularly
when going front-side. However, jumping is always good!
The spot is very safe as the current and swell always brings us to a sandy
beach shore. Viva Wyndham Tangerine tends to be the landing spot after breakage or
sudden wind drop. Speaking of, sudden wind drops are usually preceded by a strong
offshore gust, that's our cue to hurry back to shore. It happens as clouds fill up
the sky and move towards the sun/West. Normally, it's accompanied by a slight temperature drop.
The windsurfers benefit from a dedicated area where traffic is rarely (dare I say never?)
an issue. Even on a wave, tons of room and waves for everyone :)
Encuentro is another spot close-by (a couple of miles from Cabarete) which has
more consistent and cleaner waves. The reef is very close to the beach, great for
photo shoots! It does require a vehicle to bring our gear with us.

∨
Onshore, sideshore, offshore, what does that all mean?
It describes the wind direction in relation to the shore (or beach).
Onshore means that the wind is blowing towards the shore, sideshore (or crosshore),
parallel to the shore, and offshore, away from the shore.
If the waves run parallel to the shore, then the wind/waves and wind/shore angle
is the same.
In Cabarete, the waves do not run parallel to the beach.
They come from the NW, N, NE and E, and sometimes all of the above :D !
The wind can come from NE to SE. (We do get a few random days from the NW!)
So, we get offshore days when the wind blows from the SE and waves come from the N.
Sideshore when wind is SE and waves NE, or ESE and NNE, sideonshore (mix of sideshore and onshore) when
wind is from the E (ENE-ESE) and waves from the NE (NE-E).
Beyond wind direction, I feel like wave direction has a greater influence over the quality
front-side wave riding over here. The way the tides come in, time of the day, some E days can
produce nearly sideshore quality wave riding.
∨
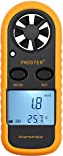
What's this "knot" thing?
A knot is a unit of speed. We use it when referring to the wind speed or
a sailor's speed. Personally, I used my anemometer often, sailing random spots, it helped me determine the size of the sail
to use and also match online weather stations readings.
1 knot = 1.15 mph = 1.85 kph.
10-12 knots ~ 12-14 mph ~ 18-22 kph
20 knots ~ 23 mph ~ 37 kph
60 knots ~ 69 mph ~ 111 kph
∨
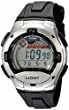
What's that watch you are wearing?
Ha! Good eye... :) To be honest, I just wanted something cheap that I could lose or break and not have to worry too
much about it. Then I thought, wouldn't it be cool if I had the tide info on the watch too?
And I found this Casio W-753
a few years back. It's been working well for my needs.
I haven't had to change the battery or bracelet so far, and where I live it's very salty!
Now, I'm not sure I would wear it out at a restaurant but for outdoors and to play in the water, it's good!
∨
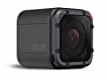
Can you describe your camera setup?
Originally, I used the GoPro Hero HD (I guess the closest model today is the
GoPro Hero).
It lasted for years. Because of the humidity here, it was prone to fogging.
I home made some powdered silica gel packets and needed to dry them after each use!
One day one of those packets got stuck in the door of waterproof case, let some water in and that was the end of it.
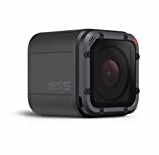
Since then, I've been using the GoPro Hero5 Session.
Although a bit more prone to odd behaviors, it has amazing picture quality, great viewing angle, super light weight, all in a very small package.
I always film in 1440p (1.4k or 1920x1440) with 4:3.
The battery lasts almost as long as 960p and the quality is
quite amazing. Then, I stretch the image in post-processing to get as close to 16:9.
I did try a generic Chinese brand such as this one, but the narrower angle, unavailability of the
4:3 format, lower picture quality and shorter battery life just don't quite cut it for my use.
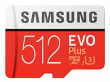
I use it with the Lexar 633x micro sd card, which has been working great.
Beware of fake cards out there, GoPro cameras seem to be quite sensitive to the types of cards used.
Samsung cards get really good
reviews, just make sure the card's speed matches the camera's requirement.
Here is the GoPro link to
their recommended cards for their cameras.
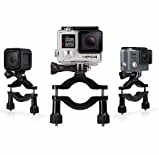
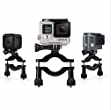
You may be familiar with my custom mount which I portrayed in this video. It's been working really well with no problem for years.
I use the GoPro Roll Bar Mount
to attach the camera to my mount. The one thing to watch out for with the roll bar mount is that if it becomes undone we may
lose half of the clamp. It has happened to me so I placed some electrical tape over the screw so the clamp stayed on long enough
until I grab it. It's important to tighten those screws well and that's where the official GoPro mount's quality is important.
Gear
Harness
∨
Waist or seat harness?
Generally speaking, I prefer a waist harness for sails 7.0 and below, and a seat for 7.0 and above.
If I'm using a formula board with 7.0, then I'd take a seat :) while if I were to use
a 105L board instead, then I'd go with a waist.
When wearing a seat harness and a catapult comes, we may get lifted off our feet and have little chance to
recover. With a waist, the extra control we get over our lower body may help us save the situation.
It's also more comfortable during hooked-in jumps.
For larger sails and wider boards (>115L), where we use a longer more powerful fin (~40cm+),
I feel like I can handle more power pushing against the rails and getting my body more outboard with a seat.
The stance feels quite locked down then.
Waist Harness:
- Higher harness hook makes it easy to hook in and out
- Comfortable, wrap-around support, maintains lower back
- Ready-to-go stance, maneuver-oriented
- Allows more freedom of movement, body rotation
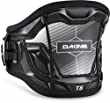
- ex: ION Radium (quite rigid), Dakine T-Series (softer)
Seat Harness:
- Straps wrap around legs to hold harness down
- Lower hook coupled with longer harness lines increase bigger sail reactivity
- More drive through bigger sails, wide boards and long fins (hiked out position)
- More control over bigger sail fully leveraging body weight
- ex: Dakine XT Seat (seat harness with a higher hook)
- Higher harness hook makes it easy to hook in and out
- Comfortable, wrap-around support, maintains lower back
- Ready-to-go stance, maneuver-oriented
- Allows more freedom of movement, body rotation
- ex: ION Radium (quite rigid), Dakine T-Series (softer)
Seat Harness:

- Straps wrap around legs to hold harness down
- Lower hook coupled with longer harness lines increase bigger sail reactivity
- More drive through bigger sails, wide boards and long fins (hiked out position)
- More control over bigger sail fully leveraging body weight
- ex: Dakine XT Seat (seat harness with a higher hook)
∨
My waist harness is riding up!
Unfortunately, that is very likely! Pretty much every waist harness user has the
issue. This is mostly true when surf sailing where we spend lots of time
slogging. What works best for me is to avoid tightening the elastic
adjustable strap (I simply overlap it without adding any tension) then I tighten the bar a lot, very very firm.
The underlying elastic strap may wrinkle up some.
This way, the harness won't overtighten and impede motion/breathing.
Yet, the harness remains somewhat loose and lets me set it back down by breathing in after a fall.
One other thing I did was to use some small velcro strap to wrap around the elastic belt
and the bar. That way the bar won't slip over the elastic band while staying somewhat
lower too.
One important factor to remember, we must make an effort and stand tall to drive the
power of the sail forward through our legs, especially the front one. With strong legs we transfer
more power onto the board and go faster.
∨
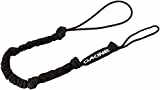
Do I need a harness sliding bar? Hook or roller?
It's a bit of a personal preference, but I like the sliding bar to turn my body more to the side when heading upwind.
I feel like I can point higher up with my hips turned farther over towards the wind.
The sliding bar is found on the
Dakine T-Series.
Having the hook towards our back side also works against catapults as it lets us drive even more weight
through the harness.
Now, without the sliding bar like on the more budget-friendly
Dakine NRG or
more expensive ION Radium, I yank the harness slightly to the side when hooking in,
this positions the hook to the back and works almost as well.
It's a bit harder over a wetsuit though and the range is more limited.
As far as the roller pin goes, I tried it and it snapped after some time even though I had kept an eye on it.
One needs to make sure it's always tight. Some riders really like them and it may work well with lines
spread farther apart.
I prefer the regular hook which helps prevent accidental unhooking and spreads the load
over two spots on the lines.
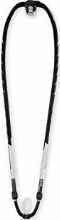
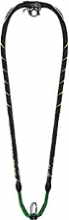
Harness Lines
∨
Do I need short or long harness lines? Mono or dual?
It's a bit of a personal preference too!
Long lines give more sail swing, may be important when maneuvering a large sail (7.0+).
Long lines let us hike out more, work better when well powered up.
They are also easier to hook in and out.
Now, ultimately what's more important is to be able to drive as close to 100% of the
sail power through our hips/legs onto the board. Our arms are there only to fine-tune the sail angle, most
of it is done through body movement.
To achieve this, we need to be comfortable, it's probably best to determine preferred boom height first then
use the adequate set of lines.
Adjustable
lines are a great tool until we are comfortable with a specific length.
Mono lines tend to be a touch longer than similar-sized dual version and may be more
difficult to adjust. However, they remain in place better. It seems that mono lines
are more prone to damaging the boom grip although one may use inner tube pieces to protect it.
Dual lines are a bit easier to adjust, and we may choose to only move the front or the back.
Too much swing and the lines may come back to hook in, not enough, and they may stay in place or worse hook in
when we don't want to. The Mono lines have the least amount of swing, the regular dual ones some more and
adjustable lines tend to have the most.
Hot Sails lines measure longer than Dakine and have more swing.
Over time, I have found out that I like some swing in my lines
which helps with unhooking, but not too much!
Finally, white Dakine lines tend to last longer than their black version.
Narrow grip booms may cause slight accelerated wear by rubbing and pinching against a weaker part of the lines so it's
a good idea to use some inner tube material to widen the grip where the lines go.
Although this may not work when using several sails on the same boom since it makes adjusting more difficult.
∨
Should harness lines be close or far apart?
As in having our hands apart on the boom, lines far apart help to stabilize the sail, it tames it down.
It's a bit more forgiving to improper sail trim and wind variations. However, they may require
heavier input to adjust the sail angle. Lines close together let us have more maneuverability
over the sail, which is important with the larger sizes since they take more effort to move around.
∨
Where should I place my lines?
One tip that's worked well for me for all sizes is to lift up the sail with one hand.
Where the sail balances on the boom is where the lines should be.
It can then be fine tuned on the water.
Board
∨
My feet are afraid of the straps!
Mine are afraid too! It's completely normal.
What you can do is set them inboard, open them enough so they don't feel too snug.
Maybe try to reach the rear one first. If you go the most common front foot first, be sure to sheet out
slightly when lifting off your back foot, it's a bit as if you'll be steering upwind while doing so and should
prevent most catapults. Look for smooth waters before lifting off the rear foot.
Use a larger board with a smaller sail.
The more time you spend planing, the more you get accustomed to speed and
the more comfortable you'll be using the harness lessening the load on your arms.
Straps will then become a tool and you will want to be in them all the time :) !
Mine are quite wide and open. To drive the board forward, I roll my front foot to the side
and lean against the side of the strap, while my back foot is set roughly at 45 degrees
inside the rear strap.
∨
Do I need 1 (single), 2 (twin), 3 (tri) or 4 (quad) fins?
Personally, I like single fins for most spots where there are no waves.
Or, for bump & jump over choppy/messy waters when waves are too crappy for riding either side.
The single is worry-free, has good lift, speed, and is fast upwind.
Possibly, for higher-wind venues, a multi-fin setup would help top end control,
effectively reducing lift so long as the shape is chop/current friendly, then it can make sense.
Generally speaking the more wind the more formed the water becomes even on lakes!
On the wave, multi-fins are hard to beat at least fun factor-wise!
Reducing fin length increases a board's rail-to-rail response. So the
board automatically becomes more reactive, turns can be tighter and more precise.
The bottom turn feels safer with the increased fin grip.
The release at the top turn is also snappier.
The slide can be more controlled and in general spin-outs are easier to recover from the
added side area. Ex: Two short fins have more side area than one longer one (2x16cm vs 1x23cm).
Twin:
They feel almost like a single once up at a decent planing speed.
They can be fast!
The release is more progressive than singles, with less low-end drive, upwind
angle is somewhat reduced.
However, the board trim can be more easily adjusted, we have more control
over bad chop, overpowered, and on a wave... they feel insanely fun!
Tri or Thruster:
Essentially a small single with more grip. Compare to a single: more reactivity, more top end control,
greater spin-out recovery and controlled top turn slides. Top speed, planing and
upwind are affected some.
Quad: A Twin with more grip. Huge amount of grip, great to climb white water, slash
huge top turns, incredible top end control, recovers spin-outs instantly.
Makes us feel like a world champion on a wave. Does require good wind or some wave,
can be difficult in messy waters.
For here, in Cabarete, unless the water is a complete mess, I'll take my Kode Wave Twin.
I have extra volume and length, tons of speed on the wave and it's very good at jumping too.
Yet, the Tabou Single was my all-time favorite that can do everything well. The Kode is just
so much fun on the wave, feels more free.
The Quad is the best on the wave, good volume, smooth turns in all conditions and fantastic
release up top. I rarely use it though since good front-side wave riding has been scarce.
∨
Should I buy a Freestyle wave or a wave board?
Generally, a wave board will favor control and sharp turns while a freestyle wave board will prioritize speed and ease of planing.
One of the differences between the two is volume distribution. Freestyle wave boards tend to have more volume under
the feet or the rider. This provides more support in the lulls, more drive on the weaker wave, and a greater pop for jumps.
So, when the wind is light and the waves are mushy, a freestyle wave board may make sense.
Freestyle wave boards make staying and getting upwind easier. They also have a better pop
and are good for jumps. They are more likely to plane out of jibes. They respond well to back-foot riding and are good
for heavier riders.
If the wind is strong and waves are powerful, then a wave shape may be more appropriate.
Lighter riders may also find them easier to control as they require less input to turn and trim.
They are best for tighter more precise turns and higher sustained wind control. They can be
carved from either foot letting the rider fully engage the board's rail into the turns.
Freestyle wave:
- Planes and keeps planing easily
- Forgiving to clumsy input
- Easy to sail in a straight line
- Pops and jumps well
- Likely to plane out of jibes
- Good for heavier riders
Wave:
- High wind control
- Precise sharp wave turns
- Tight turning radius at higher speeds
- Smooth jibe over rough terrain
- Can carve over any rail section
- Easier to handle for lighter riders
Beyond all this, there's a feel that's hard to describe when we use boards. We all have slightly different techniques and approaches to coming into turns and slashing. An advanced sailor may get a freestyle wave to work in side-on to near side conditions leveraging board speed and being more aggressive in his turns to counteract the board's stiffness. While, an intermediate sailor may benefit from a wave board to reach the critical sections of the wave and go more vertical. Personally, I enjoy the fact that freestyle wave boards tend to be easier on the body and have a strong willingness to pop and jump. On the other hand, I love riding and carving so I spend more time on wave boards, they also help me jibing when the water is choppy. Additionally, some freestyle wave boards have excellent wave riding abilities (ex: 2014 JP FSW) and can turn over either foot. While others are more dedicated to ease of sailing and control (ex: 2018 Fanatic FW STB), which turns over the back foot. Similarly, some wave boards can be easier than others (ex: 2017 Fanatic Tri-Wave) and just as fast as most freestyle wave boards. While some are fully dedicated to wave riding and will need solid wind or cleaner water state to fully shine (ex: 2014 Starboard Quad). Shapes do change from year to year, something important to consider when researching a particular board.
Sail
∨
How do I know my sail is rigged right?
Besides reading specs written on the sail, we should expect some level of
looseness up top when pulling in on the downhaul at the mast base.
Most (nice) manufacturers will have a downhaul looseness mark on the sail.
Then, when tightening the outhaul some (3-6cms), battens should be either in
front or besides the mast.
The way I see it is downhaul locks the power up and down.
Tightening the downhaul brings the power down, reduces the size of the pocket,
and lets the wind escape out over the top.
The outhaul dials in the power left to right, the more we pull, the more we flatten the pocket and
reduce power.
If a sail feels heavy up top, always pulling without releasing power, it may need some more downhaul.
It's a good idea to find the max downhaul on a sail first. Max downhaul is reached
when the sail feels like it won't breathe when pumping, really light in the hands, it gets twitchy and
won't lift the board out of the water.
The outhaul plays a role in stabilizing the power, if a sail moves around a bit (cannot
seem to find the sweet spot with the harness lines) and
was set up for light winds, increasing outhaul may help finish up the session.
You may press on the sail near the boom to see how far it touches basically acting like the wind
pressuring the sail.
You can also have someone step on the mast tip while you press down on the extension
to mimic wind load. This works well to get an idea of what the sail looks like under power!
∨
How much spread between sail sizes for my quiver?
In theory, sail size must match rider's weight with wind speed.
Enough surface area is needed to drag us out of the water and start planing.
Any extra surface beyond the minimum planing requirement will help get more speed so long as we can
manage the extra power.
In practice, speed sailors use more surface than needed with a small fast board.
On the other hand, freestyle riders tend to use less surface with early planing board and more volume.
Then, we have the rest of us that freeride or sail waves.
This is why I based my charts on wind range instead of wind speed.
In general, I recommend building a quiver gradually increasing sail gaps.
This ensures that the difference of power between surfaces is linear.
In the charts below, you can calculate from either the smallest (left button) or the biggest sail (right button).
First, select your weight:
For 6 sails and 20-knot range, 5 sails and 17-knot range, or 4 sails and 14-knot range:
0 (smallest), (biggest)
For 5 sails and 15-knot range, 4 sails and 12-knot range, or 3-sails and 9-knot range:
0 (smallest), (biggest)
For 5 sails and 12-knot range, 4 sails and 10-knot range, or 3 sails and 8-knot range:
0 (smallest), (biggest)
The following chart was pulled from this online calculator.
It represents the minimum wind speed to plane and I have to say it looks quite close. I would recommend
these sizes for freeriding while keeping in mind that the wind speed listed is the minimum.
The way I see it is 19 kt = 19 solid knots = 17-24 kt, but not 15-22 kt, that would be more like 17 kt then.
For gusty winds, winds with lots of holes or where the wind drops often, it's often recommended using a size
above what you would normally use in solid winds.
Rider weight for Light, Average and Heavy are the same as the ones used on my quiver calculator above.
First, select your weight:
For 6 sails and 20-knot range, 5 sails and 17-knot range, or 4 sails and 14-knot range:
0 (smallest), (biggest)
0 (smallest), (biggest)
0 (smallest), (biggest)
| Wind | Light | Average | Heavy |
|---|---|---|---|
| 10 kt | 8.0 | 10.0 | 12.0 |
| 13 kt | 6.1 | 7.8 | 9.4 |
| 16 kt | 4.8 | 6.3 | 7.5 |
| 19 kt | 4.0 | 5.3 | 6.4 |
| 22 kt | 3.6 | 4.6 | 5.5 |
| 25 kt | 3.2 | 4.0 | 4.8 |
Mast Base
∨
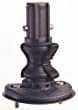
Which mast base and deck plate do you recommend, tendon, boge, or mechanical ? Euro or US ?
A variety of mast bases are available from manufacturers such as: Chinook, Duotone (or North), Streamlined, and Bic.
There are two main types of attachment to the mast extension, the Euro Pin (EP) and the US Cup (US).
Euro Pin: more direct connection between base and mast extension, use of lower mast extension setting, some models let us leave the plate on the board
US Cup: less likely to get stuck with sand or salt, if one side of the spring pins breaks, the other will still hold the extension For the deck plate, there are one or two-bolt options. The one-bolt option is designed to be screwed directed onto the mast track, the plate and the base are often a single unit. The two-bolt deck plate is first attached to the board, then the u-joint is clipped onto the plate. One-bolt: widest range of adjustment, lighter, sets the sail closer to the deck, less expensive
Two-bolt: more evenly distributed load over the mast track, plate can remain on the board, won't come off if loose, possibly less chance of breakage (more below) Finally, we have the choice of universal joints: Tendon, Boge (aka Power/Hourglass Joint) or Mechanical. Tendon: easily changed, affordable, easy to inspect, medium shock absorption
Boge: best shock absorption, may reduce chances that the board flips over
Mechanical: most resistance to damage, may get stuck, heavier
Personally, I have been using a two-bolt US-Cup Streamlined base with tendon. As tendons seem to be interchangeable across manufacturers, we can even mix the top and bottom of different brands :) ! Reliability, Durability, and Maintenance Tendon: Tendons can be inspected regularaly by bending the mast base while attached to the board and looking for abnormal gaps at the top and bottom near the screw holes. Occasionally, they can be taken out for inspection and changed with simple tools. It's important that the tendon is slightly compressed between the top and bottom. If there's any up-and-down play, then the tendon gets stretched and fails prematurely. I've used a washer to make sure the tendon's play was minimal. It might be necessary to squeeze the base when placing the screws back in. Another good thing about tendons is that if they fail, the board and sail are still attached by the safety lines, which are quite strong. Hourglass: I've had a newer hourglass-type joint fail because the metal to rubber bond of the lower part failed. The rubber joint ripped off and the safety strap being drilled (in order for the bolt to go through) ripped as well with little resistance. The board went its own way as I was left with just the sail in my hands :D ! I have also witnessed similar failures for this type of mast base here locally. Euro Pin: Bolt snapping is also an issue, which is mostly common on two-piece Euro pin tops using the Boge or Mechanical type of joint. On the solid stainless steel versions, offered by Chinook or Duotone, which use a tendon, it's no longer a problem. US Cup: On the US Cup there's a bolt inside the plastic cup which holds the top metal part so either the plastic cup or the metal part can fail over time. This is usually prevented though by routine inspections. It's never happened to me despite using US Cup bases that were really old. I sometimes tighten up the top bolt located inside the plastic cup in order to keep the play at a minimum. One-bolt vs Two-bolt: Play can develop at the base of one-bolt models relying on plastic parts. Any moving part made out of plastic will develop some kind of play. Two-bolt designs have metal-on-metal contact which help reduce this play. Recent one-bolt models made by Duotone also benefit from the stronger metal to metal design. In the end, I would recommend any two-bolt deck plates to spread the load on the mast track. If going with the Euro pin, choose the one-piece stainless steel version. And if going with the US Cup, one that you can tighten the top nut to minimize the play of the plastic cup over time.
US Cup: less likely to get stuck with sand or salt, if one side of the spring pins breaks, the other will still hold the extension For the deck plate, there are one or two-bolt options. The one-bolt option is designed to be screwed directed onto the mast track, the plate and the base are often a single unit. The two-bolt deck plate is first attached to the board, then the u-joint is clipped onto the plate. One-bolt: widest range of adjustment, lighter, sets the sail closer to the deck, less expensive
Two-bolt: more evenly distributed load over the mast track, plate can remain on the board, won't come off if loose, possibly less chance of breakage (more below) Finally, we have the choice of universal joints: Tendon, Boge (aka Power/Hourglass Joint) or Mechanical. Tendon: easily changed, affordable, easy to inspect, medium shock absorption

Boge: best shock absorption, may reduce chances that the board flips over
Mechanical: most resistance to damage, may get stuck, heavier
Personally, I have been using a two-bolt US-Cup Streamlined base with tendon. As tendons seem to be interchangeable across manufacturers, we can even mix the top and bottom of different brands :) ! Reliability, Durability, and Maintenance Tendon: Tendons can be inspected regularaly by bending the mast base while attached to the board and looking for abnormal gaps at the top and bottom near the screw holes. Occasionally, they can be taken out for inspection and changed with simple tools. It's important that the tendon is slightly compressed between the top and bottom. If there's any up-and-down play, then the tendon gets stretched and fails prematurely. I've used a washer to make sure the tendon's play was minimal. It might be necessary to squeeze the base when placing the screws back in. Another good thing about tendons is that if they fail, the board and sail are still attached by the safety lines, which are quite strong. Hourglass: I've had a newer hourglass-type joint fail because the metal to rubber bond of the lower part failed. The rubber joint ripped off and the safety strap being drilled (in order for the bolt to go through) ripped as well with little resistance. The board went its own way as I was left with just the sail in my hands :D ! I have also witnessed similar failures for this type of mast base here locally. Euro Pin: Bolt snapping is also an issue, which is mostly common on two-piece Euro pin tops using the Boge or Mechanical type of joint. On the solid stainless steel versions, offered by Chinook or Duotone, which use a tendon, it's no longer a problem. US Cup: On the US Cup there's a bolt inside the plastic cup which holds the top metal part so either the plastic cup or the metal part can fail over time. This is usually prevented though by routine inspections. It's never happened to me despite using US Cup bases that were really old. I sometimes tighten up the top bolt located inside the plastic cup in order to keep the play at a minimum. One-bolt vs Two-bolt: Play can develop at the base of one-bolt models relying on plastic parts. Any moving part made out of plastic will develop some kind of play. Two-bolt designs have metal-on-metal contact which help reduce this play. Recent one-bolt models made by Duotone also benefit from the stronger metal to metal design. In the end, I would recommend any two-bolt deck plates to spread the load on the mast track. If going with the Euro pin, choose the one-piece stainless steel version. And if going with the US Cup, one that you can tighten the top nut to minimize the play of the plastic cup over time.

Boom
∨
Do I need a carbon boom or is aluminum ok?
There are two ways a boom can flex, by pressing down and by pulling out.
Up and down flex is mostly due to head design. Some boom heads will flex more than others.
It can actually be nice when landing jumps or riding over chop. Now, I'm talking about a very
small amount of flex/give under the heaviest load.
When pulling out though, we want the least amount of give as possible.
As we put weight into our harness through the lines, the stiffer the connection with
the sail the more energy we can transfer onto the board leading to more speed.
This is where carbon booms are best.
Being stiffer, carbon booms may also have a thinner grip and still be lighter.
Aluminum booms may bend under heavy stress or break because of corrosion.
Carbon booms may snap without notice.
The boom head can also break independently of boom material.
The amount of extension will also impact stiffness, booms will be the stiffest at their least
extended setting.
Hybrid booms are a carbon tail (or extension) with aluminum arms. I heard it may promote galvanic
corrosion between the carbon and aluminum, but I haven't witnessed it myself. I do use a carbon tail
with an aluminum Severne metal boom. The tail came from a different boom which had similar diameter.
Now, with the smaller sails (4.7-), a strong (read also heavy) aluminum boom can perform nearly as well
as a carbon one. Sails have less torque and pure performance is not such a worry.
A carbon boom will be helpful when sailing just powered for maximum efficiency and weight advantage.
Also when well-powered with bigger sails where the rigidity helps control and stability.
Carbon: Light weight, narrow grip, rigidity
Aluminum: Reasonable price, gets the job done, may bend instead of breaking
Aluminum: Reasonable price, gets the job done, may bend instead of breaking
Technique
∨
Quick tack or snap jibe in light winds conditions?
Quick Tack. When slogging along in very light winds going for a quick tack requires a minimum of momentum, fairly friendly water state, and ideally some upwind chop to lean against to keep the nose of the board afloat.
Once around, we may need to rely on the sail to seek some drive to gain forward momentum. I often push against the sail backwind to move the nose of the board out of the wind. You can see some quick tack
(or fast tack) examples in this video. Needless to say it requires quite a bit of elements to come together to be able to complete successfully.
Snap Jibe.
Easier technically than the tack, the snap jibe (or slam jibe) is quite a fun move.
Basically, I like to head downwind slightly and switch my feet really early. If I have enough sail pressure I will place my front foot behind my current rear foot
and press down hard to rotate the board swiftly. If the wind is a bit too light then I move my front foot just in front of back foot.
I will usually pivot against some chop to give the board a bit of support and wait for a slight gust so that I can use the full power of the sail.
Because we end up in clew-first, we have more power available after turning around. We can get more drive heading a bit off the wind before we flip the sail.
Ultimately it keeps more power, more possibilities to recover when the wind gets lighter or the water moves around on us because of current and such.
Heli Tack. Another option is the heli-tack where we throw the mast low and windward to get into backwind. Then, we continue to drive the mast forward which pushes
the board downwind. We can switch our feet around, stay in clew-first for a bit, and finally flip the sail. It may be easier than the quick tack depending on swell/board angle.
∨
What's this front foot / back foot business?
The freestyle wave vs wave section alluded to front and back foot steering.
Some boards respond better in the turns when we position our body over the back of the board.
They are good at keeping speed over the back foot.
A board will be skatey when we can easily change direction with the back foot.
With some freestyle wave boards it may be the only way to get them to turn at all as their rocker is
less pronounced than wave boards. They may bog down when engaging the rail fully.
Most wave boards can be steered easily even when their full rail is in the water. More rocker,
thinner rails, let the board slice the water while carving hard on its whole length.
We can then drive the board over our front foot with the body positioned more forward.
∨
How can I improve the fastest?
From my research and experience, repetition coupled with variation is the fastest way to
master a skill. The variation of the repetition lets us envision the move better.
Around 13 years old, our brain reaches its final size, and at 25, our brain is fully developed.
However, we will still improve after 25 and beyond, there's just something about life that
wants to keep on going no matter what, and that makes it way fun :) !
The more fresh we are, the more likely we are to try things (and succeed!).
I found that, for any move we try, we have about 4-5 tries beyond which
our body decides that it's good for the day!
However, they need to be good tries with
variation. We can try a move 30 times, but only get 4 or 5 valid tries that are different
enough for our body to learn. So during the first hour or so, that's when we really
need to work the hardest. Then, it's freesailing time :)
Of course our sport can be so random as the conditions change constantly. So, we need to
adapt the type of moves that we first work on in relation to the environment.
Many windsurfing moves are linked together so it's good to do a variety of moves as
one move is likely to make another improve.
Finally, it's when we rest that our body digests and "learns."
What's interesting to think is that our best move is yet to come, and we all have it inside us.
We are better than yesterday :)
∨
How long does it take to loop?
It absolutely varies from person to person.
Also, conditions will facilitate the learning curve of certain moves.
For back loops, 1.5m side-on waves with medium winds are best, while forward loops
are better suited for 0.5-1m side waves with solid winds.
The ability to throw ourselves around, skill level, degree of comfort with the gear, with the spot,
the consistency of conditions. Everything plays a role.
But, for the sake of it, I'll take a guess... 5 good tries per session gets to 200
after 40 sessions. And these would be precious attempts. I landed my first backloop
somewhere around that number! Comparatively, front loops required many more tries, although only about
150 after understanding to pop standing up over the board as opposed to leaning back :D !
∨
Can you teach me to loop?
I may not be able to teach you but I will glady help!
It's best if you have some footage, contact me and I'll
see what I can do ;) !
∨
What is the influence of mast foot positioning?
When using your board in the middle of the recommended sail sizes, the mast should be centered.
For every size up, the mast foot can be moved forward by 1 cm, and with each size down farther back
towards the rider by 1 cm.
It seems that the water should hit the board a touch ahead of the front footstrap.
Then, if using your gear slightly out of range, general rules for finding the sweet spot are as follow:
Mast foot forward
- brings nose of the board down
- tames the board down
- more control overpowered
- more drive in the turns
- more rail in the water in the turns
- may feel sticky, draggy
Mast foot back
- rises the board nose
- more speed
- board more responsive to foot steering
- more skatey on the turns
- less rail in the water in the turns
- may feel skittish Finally, setting the mast foot more forward may require raising the boom as the mast will be slightly more raked back. Similarly, moving the mast foot back towards the rider may require to lower the boom as the mast will be more vertical.
∨
Everyone is planing earlier than me!!
It's easy to miss when we are planing earlier than others too!
It may or may not be true. If it is, and you are not underpowered,
head more downwind to plane. A stiff front arm helps keep the mast
steady and vertical, transferring more power down. Stiffen that body up,
lean back with the mast as tall as possible.
Unhook and pump like crazy, as if you were rowing with the sail,
and pushing the board off downwind, you can try bouncing the board.
Set your sail baggier (release both downhaul and outhaul) for more
lift (watch out for a reduced top speed), look at your board and fin setup.
Recovery & Health
∨
I have tendinitis in my arms, what can I do?
Hot & Cold Gel Pack
Therapy Flex Bars
Turmeric Curcumin
Supplement
∨
My back/shoulders/muscles are sore, is it normal?
Resistance Band Kit
∨
Helmet or not ? Ear protection for eardrums or surfer's ear?
Gath Helmet
Foam Ear Plugs
∨
Sore lower back? Sciatic nerve pain?
Fitness Yoga Ball
Foam Roller
Recommended repair products and accessories. That Gorilla tape is super sticky with some stretch:
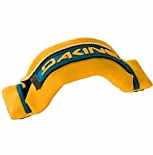
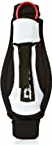
 Dakine T-8 Waist Harness
Dakine T-8 Waist Harness
Tips & Tricks top ⇧
This is a section where I try to focus on subjects which aren't commonly found online, which
helped fine tune my gear or helped me understand something technically.
How to setup a waist harness and avoid 99% of catapults with this simple trick.
How to use the Speedy Stitcher to repair straps for sails, harnesses, bags, and more!
In this video I'm using heavy duty UV resistant V92 Polyester thread.
The Number 1 Tip for all Windsurfers... the inner tube, YES :) !
Quick TIPS for better FAST TACKS :) ! Improve your success rate with these precious tips.
How to setup your straps opening and drastically reduce your chances of injury
The Top 10 secrets to faster waterstarts :) ! Light winds, strong winds, these tips will help you learn how to waterstart easily.
How to repair your windsurfing sail, x-ply or monofilm, with regular ~2" Gorilla Repair Tape and also ~3" wide Gorilla Repair Tape
Quick Tack or Fast Tack examples on low volume and light Wind. Notice
How I pull on the sail as hard as I can and hold the mast for maximum stability once on the other side.
You may use the speed setting on the youtube player to slow down the motion.
How to get your windsurfing mast unstuck with these 5 tips.
How to run the downhaul line so that it doesn't cross and is easier to adjust.
How to prevent the footstraps from twisting.
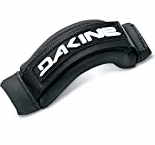
I currently use the Dakine Primo, durable, firm, good support and adjustability.
All you ever wanted to know about windsurfing footstraps and more!
Most Dakine straps can be found on Amazon. Here are a few options from Amazon.
My favorite, the
Dakine Primo which is the stiffest most direct strap.
The Dakine Pro Form is adjusted
by opening the velcro, pulling or releasing the sliding strap, it has gel-like padding and
is a touch narrower than the Primo. The Dakine
Core Countour is adjusted by using different screw holes on the straps,
they are quite stretchy and flexy.
Footstraps and harness lines suggestions, love the primos, and Dakine Lines:

Tips & Tricks top ⇧
How I built my custom camera mount. Here are some affiliated links to Amazon
of the setup I currently use. A GoPro Hero5
Session attached with their Rollbar Mount.
I tighten the camera angle screw with a screwdriver firmly.
The Lexar SD Card 633x with 32gb has been working flawlessly.
I tried some chinese brand camera but picture quality and wide angle are better with the GoPro.
10 tips to climb white water more easily and protect our gear.
Practice drills on Jibes, Tacks and even the Front Loop, that can be useful when we don't have access to water.
Want to know what a sail looks like when using different masts or mast halves?